

Table of Contents
- Essential Tools for Model Train Building: Why the Right Equipment Matters
- Model Railroad Tools for Beginners: Where to Start
- Cutting and Precision Tools: Rails, Sprue, and Small Parts
- Model Railroad Track Laying Tools and Alignment
- Model Railroad Wiring Tools and Electrical Setup
- Model Train Scenery Tools: Landscaping and Detailing
- Tool Organization, Maintenance, and Safety
- Frequently Asked Questions
Last Updated: October 21, 2026
Essential Tools for Model Train Building: Why the Right Equipment Matters
Building a model railroad layout requires precision, patience, and the right tools. The essential tools for model train building transform what could be a frustrating experience into a rewarding hobby. At BYMRR, we help hobbyists find the exact tools they need to bring their miniature worlds to life.
Think of tools as your foundation. A hobby knife that slips costs you a derailed train. Track that’s misaligned causes endless headaches. Wiring mistakes mean nothing runs. But with the right equipment, you control every detail of your layout.
The difference between a mediocre layout and a stunning one often comes down to having proper tools. You don’t need hundreds of items. You need the right ones, used correctly, and maintained well.
Model Railroad Tools for Beginners: Where to Start
Starting your first layout doesn’t require an expensive toolkit. The mistake most beginners make is buying a massive set they’ll never use.
Tier 1, Cut and assemble (buy first):
- Hobby knife with a fresh #11 blade and a supply of replacements
- Rail nippers sized for your rail code (Code 83 and Code 100 need different jaw profiles)
- Sprue cutters for plastic parts
- Self-healing cutting mat, at least 12 x 18 inches
- Precision screwdrivers in Phillips and flathead, sizes #0 and #1
- Fine-tipped tweezers, both straight and bent
- Small needle-nose pliers
Tier 2, Lay and align track (buy when benchwork is ready):
- NMRA track gauge (the standard HO gauge is the most common; N and O gauges are separate tools)
- Coupler height gauge matched to your scale
- Straightedge, 24 inches or longer
- Track nails or adhesive depending on your roadbed choice
Tier 3, Wire and maintain (buy when you power the layout):
- Wire strippers sized for 18-22 AWG wire, the range most layout bus and feeder wiring uses
- Soldering iron in the 25-40 watt range with a fine chisel tip
- Rosin-core solder and a tip-cleaning sponge or brass wool
- Digital multimeter for continuity and voltage checks
Scale changes the list. An N-scale modeler needs finer tweezers, smaller screwdrivers, and a different rail nipper jaw than an HO modeler. An O-scale or outdoor layout often calls for heavier wire, larger fasteners, and weather-resistant adhesives.
What to postpone. Airbrushes, resistance soldering units, wheel cleaners, and layout-control electronics are all worth owning eventually, but none of them belong in a first purchase.
Budget guidance. A functional Tier 1 set can be assembled for well under $100 by choosing store-brand cutting mats and a basic hobby knife, then upgrading the knife and nippers later.
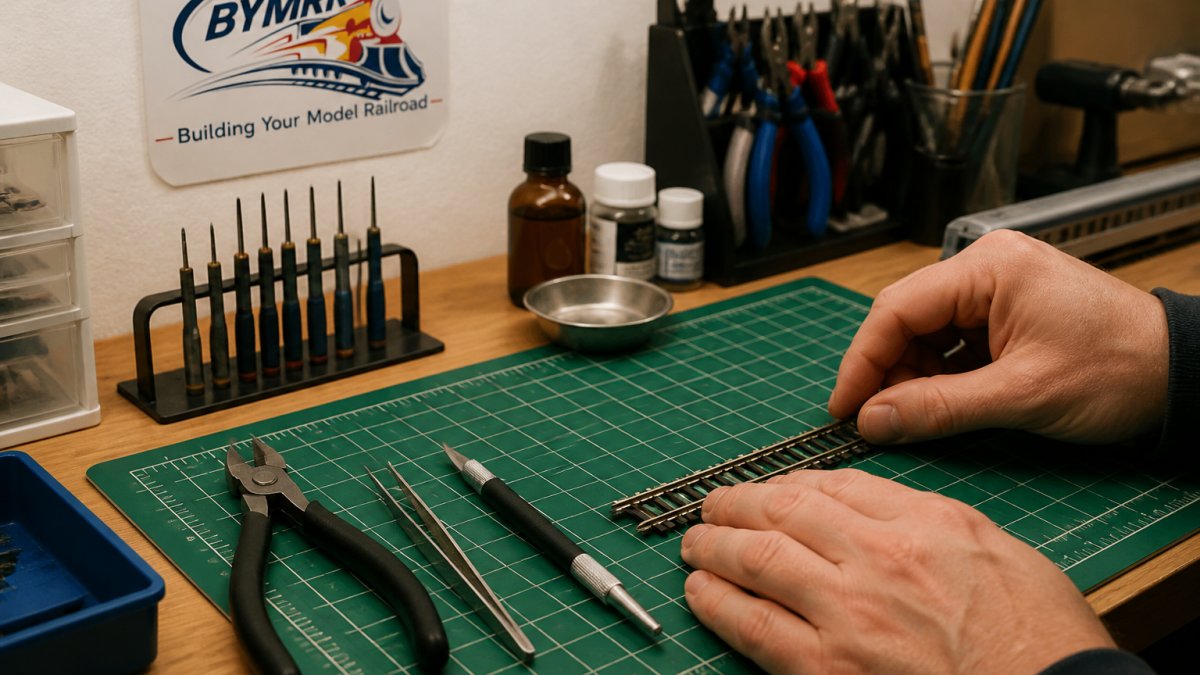
A cutting mat protects your table and gives you a safe work surface. Tweezers let you position tiny couplers and details without fumbling. Precision screwdrivers fit into tight spaces where regular tools won’t reach.
Before buying anything, decide your scale and whether the layout will be indoors or outdoors. Those two choices determine the size of nearly every tool on the list, from tweezers to wire strippers to rail nippers.
Cutting and Precision Tools: Rails, Sprue, and Small Parts
Cutting is where most model railroad projects begin. You cut track to length. You cut sprue from plastic model parts. You trim scenery materials. The tool you use determines whether your cuts are clean or jagged.
Rail nippers and cutters are non-negotiable. These specialized cutters grip rail firmly and cut through metal without bending or crushing it. Regular side cutters work, but rail nippers are designed for the job.
Hobby knives handle plastic, foam, and soft materials. A sharp blade is essential. Dull blades require pressure, which leads to slips and cuts to your fingers. Replace blades frequently. Keep multiple blades on hand so you always have a sharp one ready.
Sprue cutters remove plastic parts from sprues without damaging the parts. They cut close to the part, leaving minimal cleanup work. A hobby knife can do this, but sprue cutters are faster and safer.
Razor saws cut through thicker materials and metal with precision. They’re slower than cutters but leave cleaner edges on materials like brass and plastic.
Keep your cutting tools sharp and clean. Dull tools slip. Dirty tools bind and break. A quick wipe with a dry cloth after each use extends tool life significantly.
Model Railroad Track Laying Tools and Alignment
Track alignment determines whether your trains run smoothly or derail constantly. The right tools make alignment straightforward, but only if you know what each one checks and how to react when it fails.
The NMRA gauge is the foundation. The National Model Railroad Association publishes standard dimensions for track gauge, flangeway clearance, and wheel profiles in each scale (NMRA Standards and Recommended Practices). An NMRA track gauge is a metal or plastic template that checks rail spacing, flangeway depth, and switch clearances in one pass. Slide it along newly laid track and watch for any spot where it rocks or binds, that is your misalignment. The same gauge checks wheel sets, so a car that derails repeatedly can be tested against the standard before you tear up track.
Track-laying tools and their jobs:
- Straightedge, aligns tangent (straight) track before fastening. A 24-inch metal rule is more accurate than a shorter one because it spans more track.
- Track gauge, confirms rail spacing matches the NMRA standard for your scale. Check every few feet, not just at joints.
- Coupler height gauge, sets coupler knuckle height so cars couple reliably. Place it on a piece of track, back a car against it, and compare the coupler to the gauge’s reference line. A coupler that sits too high or too low causes random uncoupling that is hard to trace later.
- Coupler trip-pin pliers, bend the trip pin without crushing the coupler box. Use them only after the height gauge shows the pin is the problem, not the coupler body.
- Rail nippers, cut rail square. A angled cut leaves a gap that causes a click or a derailment at the joint.
- Track saw or razor saw, cleans up rail ends and cuts through thicker rail that nippers cannot handle.
A practical alignment sequence:
- Lay roadbed and let adhesive cure fully before adding track.
- Place track sections loosely and run the straightedge along tangents.
- Check gauge with the NMRA gauge at every joint and every few feet of flex track.
- Solder rail joints on curves before fastening, so the curve holds its radius.
- Fasten track, then re-check gauge, fastening can pull track out of alignment.
- Run a test car through every switch and curve before adding scenery.
Common problems and fixes:
- Derailments at a specific spot, check gauge there first. A single tight or wide spot is the usual cause.
- Cars uncoupling randomly, check coupler height with the gauge. A mismatch between two cars is more common than a single bad coupler.
- Clicking sound at a joint, the rail ends are not square or not aligned. Recut with rail nippers or a track saw.
- Switch derailments, check flangeway clearance with the NMRA gauge. A guardrail set too wide lets wheels pick the frog.
A common mistake is rushing track installation. Take time to check alignment before securing track. Use your gauge. Test your couplers. Run a test train through each section before building scenery over it. Finding problems early beats tearing apart finished scenery later.
Do not fasten flex track until you have checked gauge along its full length. Fastening a curve that is slightly out of gauge locks the error in place and makes it much harder to correct later.
Model Railroad Wiring Tools and Electrical Setup
Electrical problems cause most layout failures. Poor connections, reversed polarity, and loose wires create frustration. The right wiring tools prevent these issues.
Wire strippers remove insulation without nicking the wire underneath. Nicked wire breaks during installation or later when you move things around.
Soldering iron and solder create permanent electrical connections. Solder joints don’t loosen over time like twisted connections do. A 30-watt iron works for model railroading. Higher wattage heats too fast and damages components.
Multimeter tests for continuity and checks voltage. Before you assume a track is dead, test it with a multimeter. Many “broken” tracks just have a bad connection somewhere.
Wire crimpers attach terminals to wire ends. Crimped connections are stronger and more reliable than soldered ones for some applications.
Start with the basics: wire strippers, solder, and a soldering iron. Add a multimeter once you’re comfortable with wiring. These three tools solve 90% of electrical problems.
Model Train Scenery Tools: Landscaping and Detailing
Scenery transforms a collection of tracks into a believable world. Scenery tools help you add realism and detail.
Foam cradles hold scenery materials while you work. They prevent materials from rolling around and getting damaged. A piece of foam with a depression carved into it works as a cradle.
Fiberglass pencils apply adhesive precisely. The fine tip lets you glue small details without creating messy blobs.
Adhesives vary by material. Plastic cement bonds plastic parts. White glue works for paper and scenic materials. Contact cement bonds foam and rubber. Use the right adhesive for each material.
Small brushes apply paint and adhesive to detailed areas. Tweezers place trees, figures, and tiny details. A hobby knife trims scenery materials to fit.
Scenery work is slower than track laying, but it’s where your layout becomes unique. Take your time. Small details create big impact.
Tool Organization, Maintenance, and Safety
Organized tools save time and prevent damage. A cluttered workbench leads to lost tools and broken parts.
Store cutting tools safely. Blade guards prevent accidents and keep blades sharp. Keep soldering irons unplugged when not in use. Store solder in a cool, dry place.
Clean tools after each session. Wipe blades and cutters dry. Remove solder residue from your iron’s tip. Dust off your workbench. A 10-minute cleanup routine prevents rust and extends tool life.
Safety matters. Wear eye protection when cutting or soldering. Keep your fingers away from blade paths. Never point a hobby knife at yourself. Soldering irons reach extreme temperatures. Treat them with respect.
Organize your workspace logically. Keep frequently used tools within arm’s reach. Store specialty tools in labeled containers. Label drawers so you find what you need quickly.
Most model railroaders organize tools by project stage: cutting tools in one area, assembly tools in another, wiring tools in a third. This workflow organization cuts your setup time in half.
Maintenance extends tool life. A $15 hobby knife that lasts five years costs less per month than replacing a cheap one annually. Invest in quality tools and care for them properly.
Building a stunning model railroad layout starts with having the right tools. The essential tools for model train building aren’t complicated or expensive. Start with cutting tools, assembly tools, and track gauges. Master those.
BYMRR offers a comprehensive selection of model railroad tools. Whether you’re building your first layout or expanding an existing one, our expert team can help you find exactly what you need.
Frequently Asked Questions
What tools do you need to build a model train layout?
Start with cutting tools (hobby knife, rail nippers, sprue cutters), precision hand tools (tweezers, small screwdrivers, pliers), track tools (track nippers, coupler height gauge, cleaning block), soldering equipment for electrical work, and scenery tools (foam cradle, fiberglass pencil, adhesives). Beginners can start with basic versions and upgrade as skills develop. The specific tools depend on your scale and layout complexity.
What should a beginner model railroader buy first?
Prioritize a hobby knife, rail nippers, precision screwdrivers, tweezers, and a cutting mat. These handle most initial assembly and detail work. Add a coupler height gauge and track cleaning block once you begin laying track. Soldering tools and advanced precision instruments can wait until you tackle electrical wiring and detailed scenery. This staged approach keeps costs manageable while building competency.
What tools are best for cutting model railroad track?
Rail nippers and track cutters are purpose-built for cutting rails cleanly without deformation. A razor saw works for heavier cuts. Always use a cutting mat underneath to protect your work surface and extend tool life. Measure twice and cut once, accurate track cuts prevent alignment problems later. Keep blades sharp; dull tools require more force and produce rough edges that derail trains.
What tools do you need for model railroad wiring?
Essential wiring tools include wire strippers, a soldering iron with solder, a multimeter for testing circuits, and precision tweezers for handling small connections. Start with a 25-40 watt soldering iron for most scales. A multimeter lets you diagnose electrical problems before they cause derailments. Quality wire strippers prevent insulation damage, which can short your layout. Practice soldering on scrap wire before working on your layout.