

Last Updated: October 28, 2026
Quick Summary
To build model railroad scenery, start by planning the layout on paper, then choose a base such as foam board or plaster cloth. Shape hills, cover the ground with glue and fine materials, and add trees in clusters last.
- Sketch the layout at a 1-inch-to-1-foot scale before buying materials
- Foam board is light and best for hills; plaster cloth is strong but slower to dry
- Thin white glue with water to hold ground cover; it dries clear
- Keep slopes gentle and test-run trains on each hill before adding ground cover
- Add trees in clusters after the ground dries, not in straight lines
Table of Contents
- Planning Your Scenery Before You Build
- Choosing a Model Railroad Scenery Base
- Gathering Model Railroad Scenery Materials and Tools
- How to Make Model Railroad Hills and Elevation Changes
- Adding Ground Cover, Grass, and Trees
- Realistic Model Railroad Scenery Ideas to Finish Your Layout
- Getting Help With Your Layout Build at BYMRR
- Frequently Asked Questions
Planning Your Scenery Before You Build
Scenery is the part of a model railroad that makes it feel real. Before you buy anything, plan where the hills, towns, and open fields will go. A clear plan saves money and keeps you from tearing up finished work.
Start by sketching the layout on paper or in layout software. Mark the track, the water, the roads, and the spots you want to fill with buildings and trees. Many hobbyists find that a simple drawing at a 1-inch-to-1-foot scale is enough to get started.
Think about the view from the front. Put your tallest scenery at the back of the layout and lower scenery near the front, so trains are easy to see. Leave clear paths for your hands to reach the track when you need to clean or repair it.
- Mark the track route and any sidings first
- Decide where hills and valleys will sit
- Note where towns, roads, and water will go
- Leave access openings for repairs and wiring
If you want help choosing planning software, compare the layout planning guides available before you commit to a design.
Choosing a Model Railroad Scenery Base
The scenery base is the surface everything else gets built on. Most builders use one of three options: foam board, plaster cloth over a frame, or a hardboard or plywood sheet with added structure.
Foam board is light and easy to carve. It works well for hills and gentle slopes. Plaster cloth is strong and holds detailed shapes. It takes longer to set, so plan your work sessions around it.
Choose a base that matches your layout’s size and weight. A large layout on a flimsy base will sag over time. A small shelf layout does not need heavy framing.
- Foam board: light, fast to cut, best for hills
- Plaster cloth: strong, holds fine detail, slower to dry
- Plywood or hardboard: rigid, good for flat areas and large layouts
Gathering Model Railroad Scenery Materials and Tools
Gather your materials before you start shaping the land. Having everything on hand keeps the work moving. You will need basic tools, glue, and scenic materials.
Common basics include a hobby knife, a hot wire foam cutter, a putty knife, and a small brush. Browse a complete guide to the essential tools for model train building to see what else you may need. For glue, many builders use white glue thinned with water, which dries clear and holds ground cover well.
Scenic materials include ballast, sand, soil, static grass, and foliage. Buy a small amount of each first and test it on a scrap board. This shows you how the colors look under your layout lighting.
- Hobby knife and hot wire cutter for shaping foam
- Putty knife and small brush for applying plaster
- White glue, thinned with water, for ground cover
- Ballast, sand, and soil for the ground surface
- Static grass and foliage for trees and bushes
Tools and materials are sold at many hobby shops and online retailers. Compare prices, check shipping times, and keep your receipts so you can return anything that is damaged.
The article lists the basic tools and scenic materials you will need, and how each is typically used.
| Item | Used for | Key note |
|---|---|---|
| Hot wire cutter | Shaping foam | Carves smooth hill curves |
| Putty knife and brush | Applying plaster | Basic application tools |
| White glue, thinned | Ground cover | Dries clear, holds material |
| Ballast and sand | Ground surface | Test on scrap board first |
| Static grass and foliage | Trees and bushes | Buy small amounts first |
How to Make Model Railroad Hills and Elevation Changes
Hills give a layout depth. Start by building a frame or base shape that matches your plan. Cut foam board to the height you want, then stack and glue the pieces to form a rough hill shape.
Next, carve the surface smooth with a hot wire cutter or a sanding block. Gentle curves look more natural than sharp peaks. Apply plaster cloth or a thin layer of plaster over the foam to lock in the shape and create a surface you can paint.
Keep the grade gentle enough for your trains. Steep slopes can cause trains to slip or stall. Test the track on the new hill before you add any ground cover. Our guide to cleaning model train tracks effectively walks you through preparing the rails before the trains run.
- Build a frame or stacked foam base
- Carve the shape into smooth, natural curves
- Cover with plaster cloth or plaster
- Test-run trains before adding scenery
Adding Ground Cover, Grass, and Trees
Ground cover makes the layout look finished. Paint the base in earth tones first. Then spread a thin layer of glue over one area at a time, and sprinkle on fine scenic materials.
Use a mix of colors and textures. Real ground is rarely one flat shade. Blend fine grass fibers, sand, and small patches of soil to create variety.
Trees are added last so they do not get in the way. Many hobbyists use a simple armature or a pre-made tree and attach it with a drop of glue into a drilled hole. Place trees in clusters, not in straight lines, for a natural look.
- Paint the base in earth tones
- Apply glue in small sections
- Sprinkle on fine grass and soil
- Add trees in groups after the ground dries
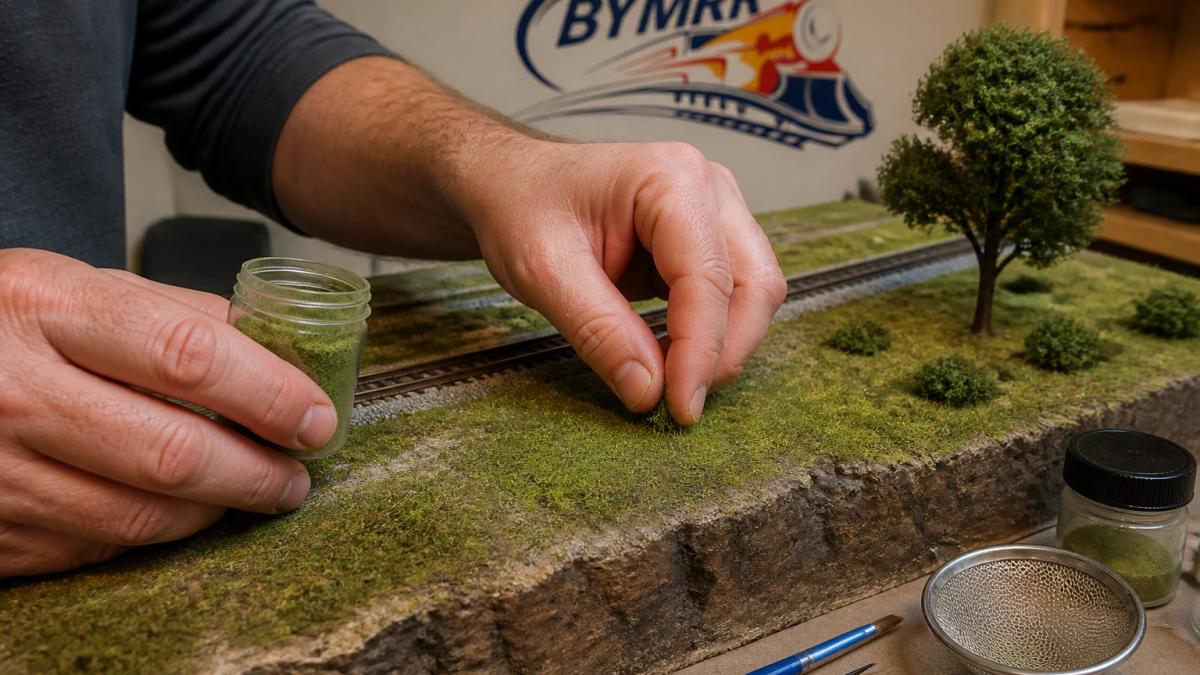
Hands in a home workshop press fine green scenic grass onto glued terrain, with a small tree and scenic tools nearby.
Realistic Model Railroad Scenery Ideas to Finish Your Layout
Small details bring a layout to life. Add a dirt road winding past a farm, a small creek running through a valley, or a row of fence posts along a field. Each detail tells a story about the place.
Consider a few ideas that work on most layouts. A rocky outcrop near the track looks natural. A parking lot beside a small store adds a town feel. Gravel piles near a construction site show activity.
Keep your scenes balanced. Spread interest across the whole layout rather than crowding everything into one corner. Step back often to see how the scene reads from the viewing spot.
- A dirt road curving past a farm
- A creek running through a valley
- A rocky outcrop beside the main line
- A small town with a parking lot and store
Getting Help With Your Layout Build at BYMRR
Building scenery takes patience, and questions come up along the way. At BYMRR, we have offered model railroad products and guides since 2008, and our store is in Virginia Beach, Virginia.
For current prices and product availability, check our website or request a quote, since pricing depends on the items you choose and delivery details.
Plan your next steps, gather your materials, and start small. A single hill or one scenic corner is a great first project. Build on it one section at a time, and your layout will grow into a scene you are proud of.
Frequently Asked Questions
How do you start building model railroad scenery?
Start by planning the layout’s shape and the landscape you want before you buy anything. Sketch where the track runs, where hills, rivers, and towns will sit, and which sections need to stay accessible for maintenance. Build the base and rough landforms first, then add ground cover, details, and structures last. Working in this order keeps glue, plaster, and dust from damaging finished work. Check the BYMRR website for current prices or request a quote before ordering.
What is the best base for model railroad scenery?
Most builders use a sturdy, lightweight base such as foam insulation board or plywood with a foam overlay, because both support carved hills and allow track and wiring to be installed underneath. Foam is easy to cut and shape, while plywood provides a firm foundation for heavier structures. Choose a base that matches your layout’s size and how often you plan to reposition sections.
How do you make hills and mountains for a model railroad?
Form the basic landform with crumpled newspaper or cut foam, securing it with masking tape, then cover it with plaster cloth or a thin plaster-and-water mix. Once the shell is dry, carve contours and add texture with a stiff brush or sponge. Sculpt slopes gradually so trains can climb them reliably, and leave access for track maintenance. Practice on a small test section before tackling your main layout.
How do you create realistic model railroad terrain?
Realistic terrain comes from varied colors, textures, and natural-looking transitions. Blend ground colors with washes and dry-brushing, then add ballast, dirt, and scenic materials in patches rather than evenly. Mix grass heights and tones, and place rocks, weeds, and debris where they would naturally collect near track and along slopes. Study real landscapes near you and copy the variety you see rather than aiming for a uniform look.
